Using Open Source Static Libraries in Xcode 4
Xcode 4.0.1 allows us to more easily create and use third party libraries in iOS projects. I think the process is still more complicated than it needs to be. Xcode’s documentation suggests that it should automatically detect implicit dependencies and index classes across workspaces but I have not found this to be the case. Here I’ll cover the steps I have found for creating and sharing code between projects and with other developers.
Background
Workspaces:
Xcode 4 introduced the concept of workspaces as containers for multiple projects. There are a couple of key behaviors of workspaces which we want to build on when choosing how to share code across projects.
- By default, all the Xcode projects in a workspace are built in the same directory, referred to as the workspace build directory.
- Xcode examines the files in the build directory to discover implicit dependencies.
- Each project in a workspace continues to have its own independent identity.
Schemes:
Within a workspace or within a project which is a member of a workspace we have schemes. Schemes replace the Active Target, Build Configuration, and Executable settings from Xcode 3 and define which targets to build, the order in which to build them, and what action to take when a build is complete. We’ll want our shared code to easily fit into the scheme of any projects which use it. The Xcode 4 Transition Guide covers this new structure in more detail.
Targets:
Within a scheme we have one or more build targets which define a set of source files to build, the settings used to build those files, and any dependencies on the build products of other targets which must be completed first. Ultimately we would like a consumer of our code to be able to state that their project’s build target depends on our shared code and have Xcode build this shared code and make it available to the active build target. We can achieve that by providing a project containing the code to be shared and a static library build target which packages it into a build product other developers can add as a build target dependency.
Using a static library
- Creating a workspace
- Adding projects to a workspace
- Adding build target dependencies
- Adding the static library’s headers
- Configuring the project’s scheme
- Fixing indexing
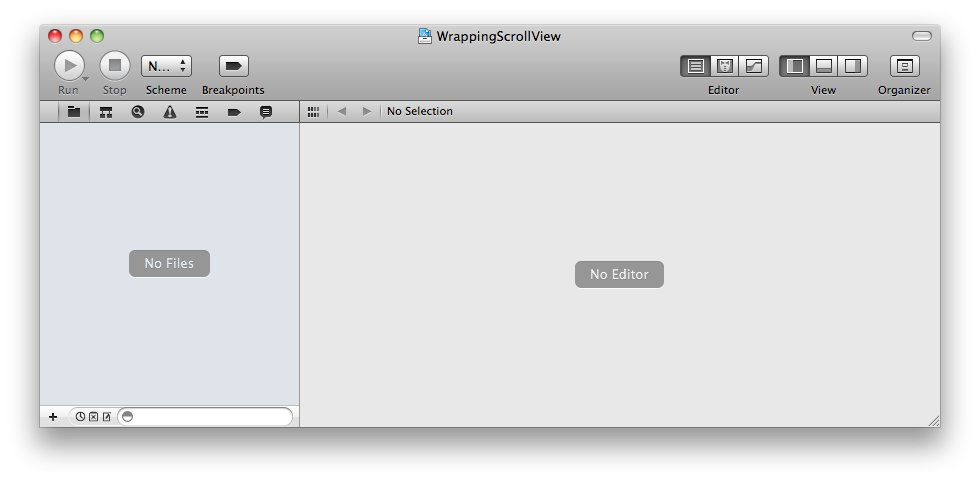
Creating a workspace
We can create a new empty workspace from Xcode’s file menu or open an existing project and select “Save As Workspace…” to create a new workspace containing our project. This will create a “.xcworkspace” package in the file system.
Adding projects to a workspace
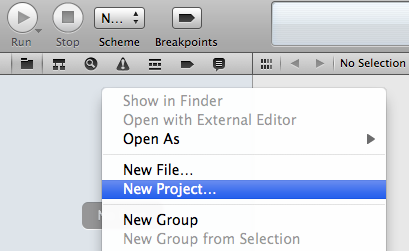
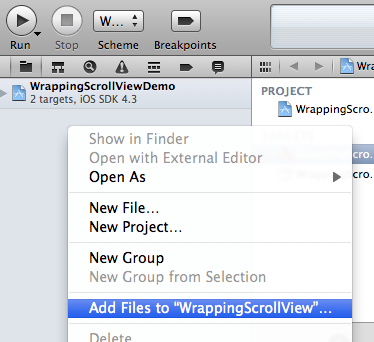
Once we have a workspace we can right-click in the workspace’s navigator to create a new project or add an existing “.xcodeproj” package.
We want to end up with a single workspace containing our app’s project and the projects for any static libraries we are going to depend on. It is worth noting that these projects are all siblings in the workspace, our static libraries are not added as references within our app’s project.
Adding build target dependencies
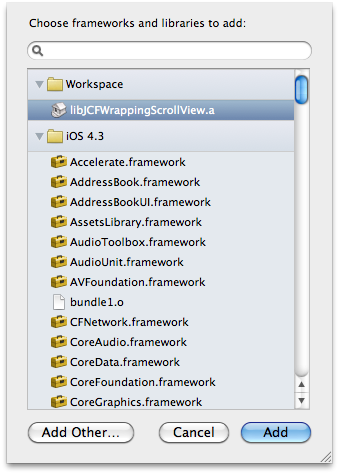
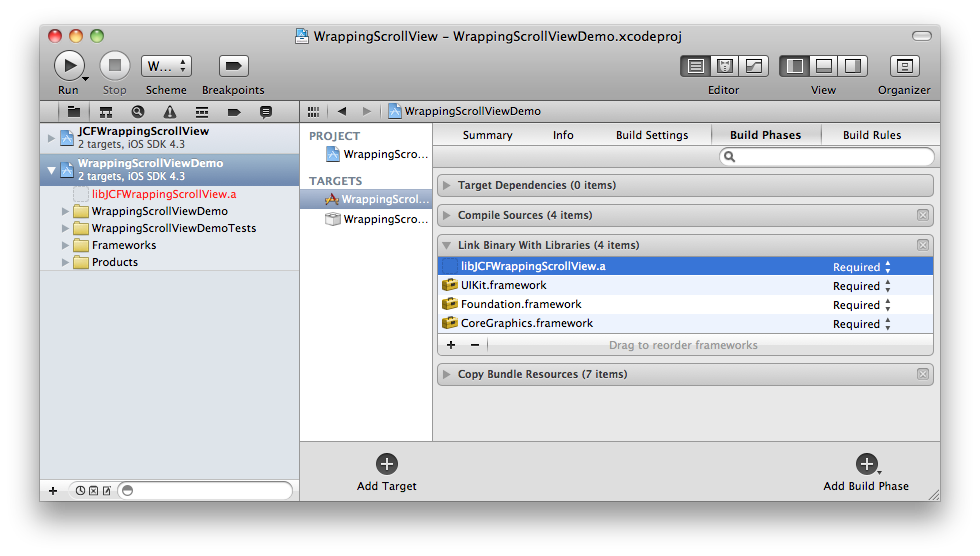
With all of the projects we need available in our workspace we can select our app’s build target and add a static library to the “Link Binary With Libraries” build phase.
Adding the static library’s headers
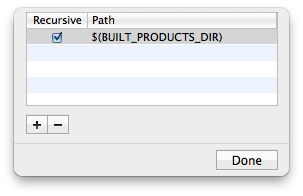
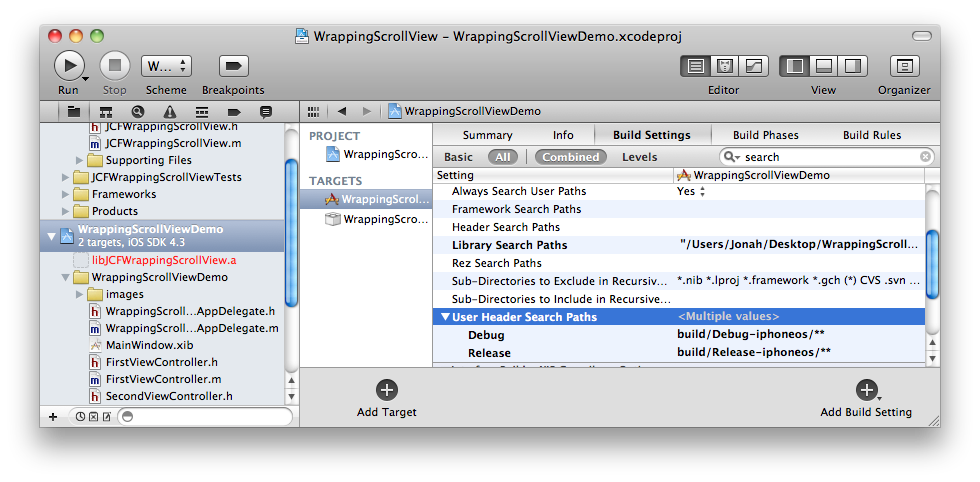
We also need to make sure that our app’s build target can locate the public headers used in this static library. Open the “Build Settings” tab and locate the “User Header Search Paths” setting. Set this to “$(BUILT_PRODUCTS_DIR)” (or “$(BUILT_PRODUCTS_DIR)/static_library_name” if we want to be more specific but then we’ll have to update this setting every time we add another library) and check the “Recursive” check box. Now our built target will search our workspace’s shared build directory to locate linkable header files.
The “User Header Search Paths” setting defines the headers available as quoted imports (eg “#import “MyLibraryClass.h”) while the “Header Search Paths” setting defines those headers available as bracketed imports (eg “#import ). I’ve found that Xcode will only autocomplete header names in the quoted form so I always add libraries to the user header search path even though, from my project’s perspective, they might be more appropriate as system level (angle bracketed) libraries.
When using a static library which includes categories we will also have to add the “-ObjC” flag to the “Other Linker Flags” build setting. This will force the linker to load all objective-c classes and categories from the library. If the library contains only categories “-all_load” or “-force_load” may be needed as well. See Technical Q&A QA1490 for a more detailed explanation of these settings.
Configuring the project’s scheme
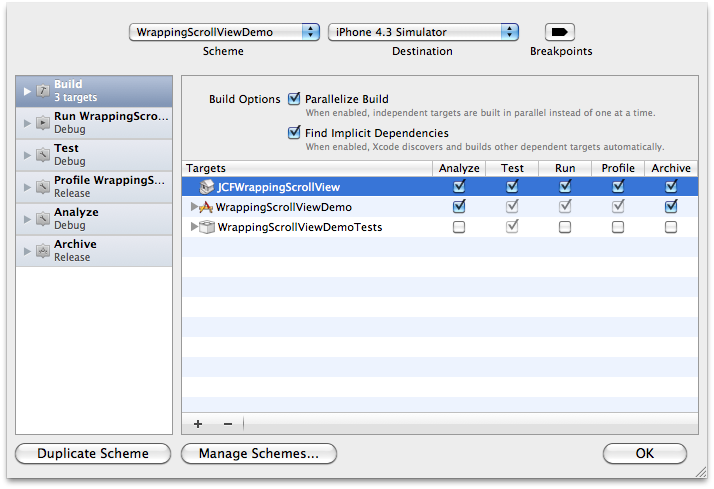
At this point Xcode should have detected this implicit dependency between our app’s project and the static library’s project and have automatically configured our schemes correctly. Unfortunately I haven’t found this to be the case in practice. Instead we will have to edit our current scheme and add the static library’s build target before our app’s build target.
Fixing indexing
At this point we should be able to include headers from dependent static libraries, use the included classes, and still successfully build our app. Unfortunately Xcode will not show any classes from these linked static libraries in code completion despite the workspace documentation stating that “indexing is done across the entire workspace, extending the scope of content-aware features such as code completion and refactoring.”
As a workaround we can drag the public headers from the static library’s project into our app’s project, adding them as references. These headers do not need to be included in any of our build targets, simply having references to the headers in our project will allow their classes to appear in code completion.
Creating a Static Library
If we plan on releasing some of our own code for reuse as a static library there are several things we should do to make sure that the process described above is as easy and simple as possible for our library’s users.
- Namespace classes appropriately
- Create a build target
- Expose public headers
- Set the installation directory
- Set the public header path
- Exclude user specific files from VCS
Namespace classes appropriately
Use an appropriate prefix for classes, protocols, functions, and constants in the library to prevent collisions with names in the library’s user’s project.
Create a build target
Provide a static library build target in the project for our users to link against. Xcode provides templates for creating projects with static libraries or adding static library build targets to existing projects.
Expose public headers
Determine which header files should be visible to users of the library. Provide a clearly named group containing these headers so that our library’s users can easily locate them as part of the workaround described in “Fixing Indexing” above. This also helps us clarify what the public interface our library provides is and what classes are implementation details which are likely to change as the library evolves.
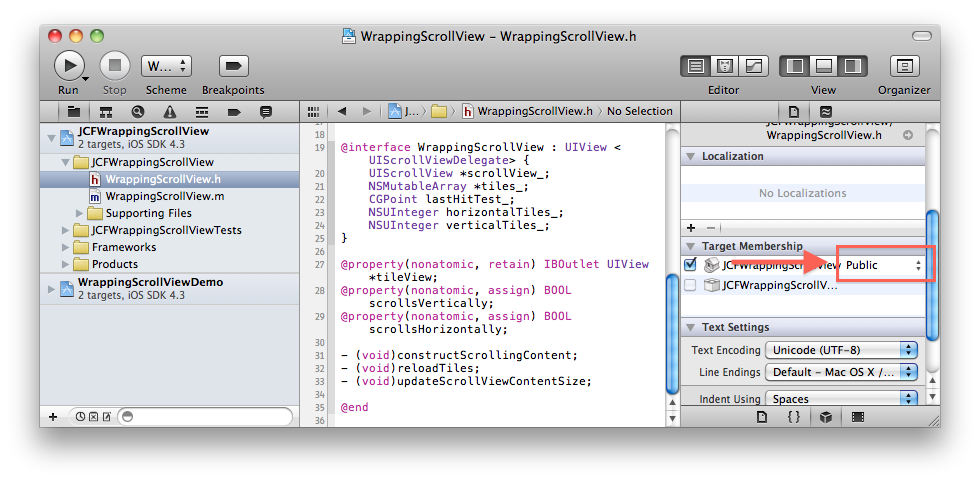
For each public header file make sure it is set as “public” in the “Target Membership” section of the inspector pane. Only public headers are going to be available for our users to import.
Set installation directory
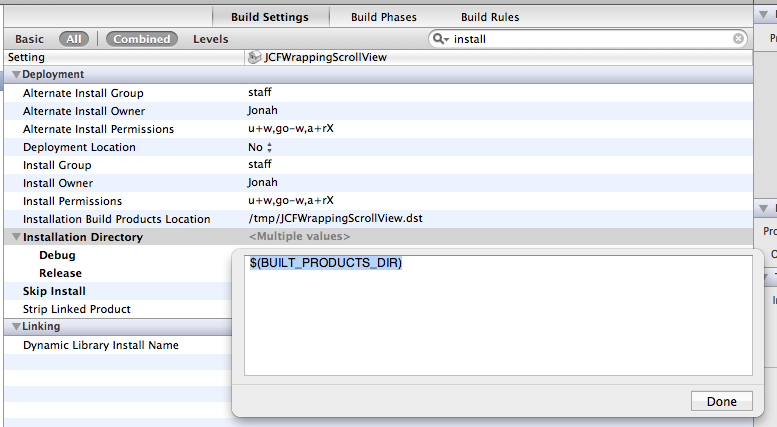
Our static library build target is going to be a member of a user’s workspace and subject to that workspace’s installation rules. Our static library build product could therefore be installed in a location set by Xcode’s preferences, in the derived data path, or in a path specified by our build target. Since we can’t control the user’s settings we should make sure our library is well behaved in all cases. I set the “Installation Directory” build setting to “$(BUILT_PRODUCTS_DIR)” so that the static library build product can be found in a known location and set the “Skip Install” build setting to “Yes” to avoid accidentally installing iOS libraries into “/usr/local/lib”.
Set the public header path
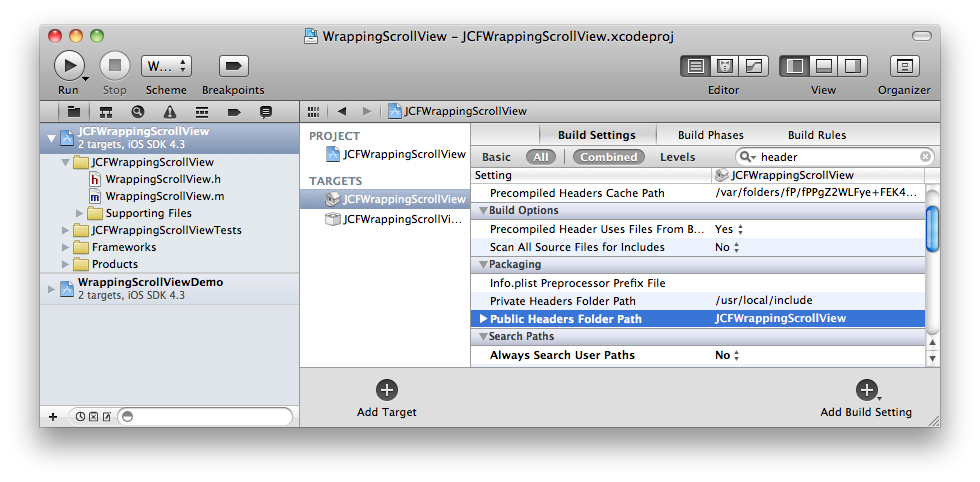
We need to specify a location to copy our static library’s public headers to so that they can be included in our users’ header search paths. Setting the “Public Headers Folder Path” to “$(TARGET_NAME)” will create a folder named after our static library build target in the workspace’s shared build directory and be indexed by the “User Header Search Paths” setting described above.
Exclude user specific files from VCS
Our workspace and project include a number of files which contain data relevant only to our user account; window positions, open files, and so on. There’s no need to check these into source control, at least not in our release branch, so let’s set some reasonable ignore rules in git or whatever VCS we are using. Github provides a convenient set of .gitignore files
Future Improvements
Hopefully Xcode 4 will eventually live up to the promise of it’s documentation and consistently auto-detect implicit dependencies and index files across the workspace correctly. There certainly seem to be a number of other developers struggling with this behavior:[1], [2], [3], [4], [5], [6], [7], [8]. Until that indexing improves I find that this process is at least somewhat simpler and cleaner than trying to maintain simulator and device compatible static library builds in Xcode 3.
I’ve found this pattern preferable to copying third party classes directly into my projects as it allows me to easily keep version history and make updates to static library projects in my workspace and avoids coupling my project too closely to the private structure and contents of the static library.
Please let me know if you can see any areas where this pattern could be improved or if you’ve found your own alternative means of sharing code.

