
The Best of Both Worlds: HTML Apps & Svelte
At Carbon Five we try to be agile about our technology choices and pick the simplest tool for the job at hand. That means that even in 2019, the era of React and Redux and GraphQL and all the other fancy tools for client-side web applications, sometimes the best tool for our clients is a good old Rails app, serving HTML. Often the vision for the project pushes us towards a Single Page Application instead — maybe the app is going to be highly interactive or include realtime data, or the client is already invested in a front-end framework. In those cases, of course, we’ll reach for React or Angular or Vue. But for the traditional CRUD app that just needs to show some data and let users update it, a small team of experienced Rails developers can get an idea to market incredibly quickly.
Sometimes we find ourselves adding a few API routes and a bit of client-side jQuery to make pieces of UI refresh a little more often, or check their validity, or some other small quality of life improvement. The jQuery’s not ideal, but there’s a feeling of “we don’t want to pull in a whole front-end framework just for this.”
Then it happens. That moment where the dev teams says, “Oh no, should we have used React?” Maybe users say the interface feels “clunky.” Or maybe the next big feature is a wizard, with lots of state, conditional fields based on values from previous pages, a dynamic progress bar, validation that should warn you about missing data but not stop you from progressing until you try to submit… the stuff they invented SPAs to deal with. That doesn’t mean the team made a mistake going with Rails! SPAs add drag to any project, and if you can get an MVP out faster without one then you’re in a great place. But still, it would be nice if there was something in between: something that had the size and simplicity of jQuery, with the more powerful declarative abstractions of React.
Svelte to the Rescue
This is where Svelte comes in. Svelte is a pretty new framework that only got its final v3 shape in April so it’s a little bleeding edge. But Svelte 1 and 2 have been going since 2016, and it’s gotten to be a pretty slick little framework. If you’re already familiar with Svelte and just want to get to the Rails integration, you might want to skip to it here. Otherwise, let’s get a little context on this framework before diving into the integration. The idea behind Svelte is that humans like writing declarative code (like React), but the browser prefers imperative changes (like with jQuery). So Svelte isn’t actually a runtime library. It’s a compiler that takes React-like component code and turns it into a set of watches and DOM manipulations. That means builds are smaller and performance is better. And maybe more importantly, because it’s a compiler, Svelte lets you spend less time thinking about performance because it does the optimizations for you. This will make more sense with an example. Here’s a simple React component that lets you count down from 10:
| import React, { useState } from "react" | |
| const CountDown = () => { | |
| const [count, setCount] = useState(0) | |
| const remaining = 10 – count | |
| const increment = () => { | |
| if (remaining > 0) { | |
| setCount(count + 1) | |
| } | |
| } | |
| return ( | |
| <div> | |
| <div>Count: {count}</div> | |
| <div>Remaining: {remaining}</div> | |
| <button onClick={increment}>Click</button> | |
| </div> | |
| ) | |
| } |
And here’s the equivalent in Svelte:
| <script> | |
| let count = 0 | |
| $: remaining = 10 – count | |
| const increment = () => { | |
| if (remaining > 0) { | |
| count++ | |
| } | |
| } | |
| </script> | |
| <div> | |
| <div>Count: {count}</div> | |
| <div>Remaining: {remaining}</div> | |
| <button on:click={increment}>Click</button> | |
| </div> |
The heart of Svelte’s magic is “reactivity”. Every let declaration sets up a listener, where any time the variable is assigned to, the change triggers a render of the component. So when the increment function calls count++, the component will re-render, which will update the value shown to the user by Count: {count}.
Since you often want to do calculations based on state, Svelte also has the “reactive declaration” symbol, $:. It’s like a let declaration, but whenever any variable referenced in the expression — count in this case — is updated, the expression is re-run, the new variable’s value is updated, and the component is re-rendered. $: declares a relationship, where remaining should always be 10 - count. This might seem weird, but it’s conceptually the same as declaring a variable that you know will be re-calculated in every React render loop — except that remaining will get recalculated only when count changes. Reactivity means that you’re able to do simple assignment in Svelte, but without the performance hit from something like AngularJS’s digest cycles. But because the complexity of setting up listeners is hidden by the compiler, Rails devs don’t have to learn a whole new programming paradigm just to write a little Svelte component. They can assign like they would in Ruby, and everything just works. If you want to see what comes out of the compiler, Svelte has a nice online REPL that lets you code a component, run it, and see its compiled output. Here’s the CountDown component.
Rails Integration
Svelte works well for full SPAs, and there are a lot of great tutorials about that. But this post will focus on the case where you’ve got a working server-rendered web app, and you want to add a little dynamic content to it. So if you’ve got a something like a Rails app, and were intrigued by that quick Svelte intro, then let’s see how to bring them together! This example will use Rails, but if you’re using another framework like Python’s Django or Elixir’s Phoenix then this all still applies. There’s just a little glue code you’ll have to add to your app, while I’ve got a library for integrating with Rails. To have a concrete example to work through, let’s imagine we’re working on a Rails app with a Contacts List page. It has an index.html.erb file for showing all your contacts, an edit.html.erb file for editing one contact, and a new.html.erb file for creating a new one. Setting Up If you want to follow along, you can check out the rails branch of this repo.
| git clone https://github.com/will-wow/contacts.git –branch rails |
Or you can set up your own project with:
| rails new contacts –database=postgresql –webpack | |
| rake db:create | |
| rails g scaffold Contact name:string email:string twitter:string phone:string | |
| rake db:migrate |
At this point, you should have a simple contacts app with controllers that handle HTML and JSON requests. With a little bootstrap styling, it looks like this:
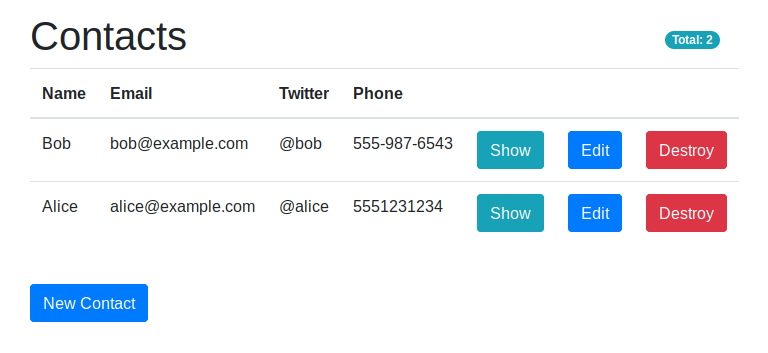
It’s amazing how easy it is to make these HTML pages with Rails generators. But of course, it can’t last. Next on the backlog is a story to allow users to update contacts inline on the index page. It would be a doable to use jQuery to code up the logic to do CRUD operations on the rows in that index table. But if you’ve spent time building front ends with components, it’s hard to go back. Svelte lets us do that with a minimum of fuss or code bloat. We’ll be adding a ContactList and ContactRow for the editable contacts, and a ContactCounter for that badge in the corner — and when we’re done, this whole thing will add up to only 14.58 KB gzipped, which is about as well as you would do with a jQuery solution. So let’s add Svelte! To add it to the Rails app, just run
| rake webpacker:install:svelte |
If that fails, you may need to switch to the master version of Webpacker to get Svelte support:
| gem 'webpacker', git: "https://github.com/rails/webpacker.git" |
At this point, webpacker will compile Svelte for you. By default, it’ll only recompile when you reload the page, which is pretty slow. But if you run bin/webpack-dev-server in a separate terminal, compilation will speed up significantly. If you’re not using Rails, you’ll have to set up a Webpack build pipeline (if you haven’t already), and then add the Webpack svelte-loader.
The Plan
Now that we’ve added Svelte, what are we going to do with it? The plan here is we’ll create a few small components that will take in props (like a list of contacts) from our Rails ERB templates, and use them to initialize state and render HTML. We won’t be totally throwing away the ERB templates, just replacing pieces of them with these reactive components.
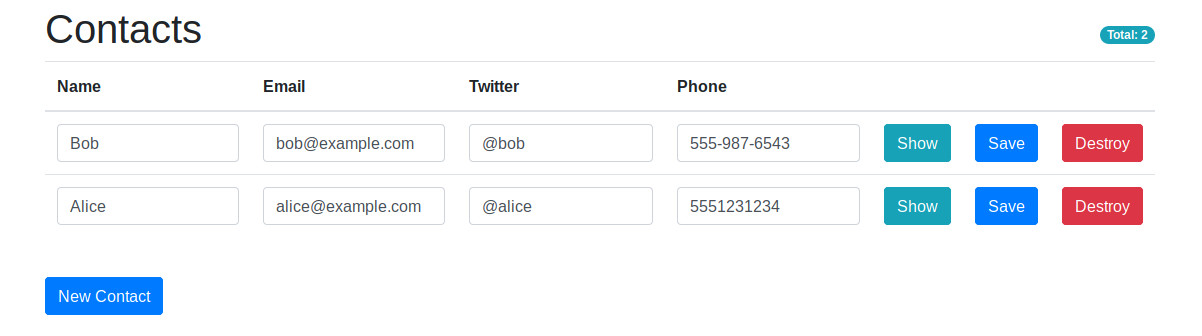
ContactRow
Before Svelte, the HTML for a row looks like this:
| <!– app/views/contacts/index.html.erb –> | |
| <% @contacts.each do |contact| %> | |
| <tr> | |
| <td><%= contact.name %></td> | |
| <td><%= contact.email %></td> | |
| <td><%= contact.twitter %></td> | |
| <td><%= contact.phone %></td> | |
| <td><%= link_to 'Show', contact, class: "btn btn-info" %></td> | |
| <td> | |
| <%= link_to 'Edit', edit_contact_path(contact), class: "btn btn-primary" %> | |
| </td> | |
| <td> | |
| <%= link_to 'Destroy', contact, method: :delete, class: "btn btn-danger", | |
| data: { confirm: 'Are you sure?' } %> | |
| </td> | |
| </tr> | |
| <% end %> |
We can turn that into a Svelte component that looks like this:
| <!– app/javascript/src/components/ContactRow.svelte –> | |
| <script> | |
| export let contact | |
| export let onSave | |
| export let onDelete | |
| const handleDelete = () => { | |
| if (confirm("Are you sure?")) { | |
| onDelete() | |
| } | |
| } | |
| </script> | |
| <tr> | |
| <td> | |
| <input | |
| class="form-control" | |
| type="text" | |
| name="name" | |
| bind:value={contact.name} | |
| /> | |
| </td> | |
| <td> | |
| <input class="form-control" name="email" bind:value={contact.email} /> | |
| </td> | |
| <td> | |
| <input class="form-control" name="twitter" bind:value={contact.twitter} /> | |
| </td> | |
| <td> | |
| <input class="form-control" name="phone" bind:value={contact.phone} /> | |
| </td> | |
| <td> | |
| <a class="btn btn-info btn-xs" href="/contacts/{contact.id}>Show</a> | |
| </td> | |
| <td> | |
| <button class="btn btn-primary btn-xs" on:click={handleSave}> | |
| Save | |
| </button> | |
| </td> | |
| <td> | |
| <button class="btn btn-danger btn-xs" on:click={handleDelete}> | |
| Destroy | |
| </button> | |
| </td> | |
| </tr> |
Like Vue and sometimes React, Svelte combines a component’s logic, styling, and markup in a single file. And the conversion isn’t too bad! The markup is just the same HTML, but now with inputs. There are only a couple things that stand out as not standard HTML/JS. First, those exports at the top. Svelte components declare props with export let statements, which is odd at first, and then fine once you get used to it. So some parent component will pass a contact into this ContactRow (which will eventually come from an ERB template), and it’ll handle rendering and updating the contact. Second, the bind:value={value} syntax sets up two-way binding, so the parent component that sends in a contact will get reactive updates whenever the user types a character. Like with React, you can pass in callback props like onSave and onDelete, which is the main way you send data out of a component to a parent. Svelte also has support for custom events, but in practice they seem to be less common in custom components. For native elements like a button though, you add a listener to an event with the on:click={onSave} syntax. ContactList As we saw, a parent will need to pass the contact, onSave, and onDelete props to each ContactRow. That’s the job of the ContactList:
| <!– app/javascript/src/components/ContactList.svelte –> | |
| <script> | |
| import Api from "./api" | |
| import ContactRow from "./ContactRow.svelte" | |
| export const saveContact = contact => | |
| Api.put(`/contacts/${contact.id}.json`, { contact }) | |
| const deleteContact = (contact) => { | |
| Api.delete(`/contacts/${contact.id}.json`) | |
| contacts = contacts.filter(({ id }) => id !== contact.id) | |
| } | |
| export let contacts | |
| </script> | |
| {#each contacts as contact} | |
| <!– bind to update the store from the ContactRow –> | |
| <ContactRow | |
| bind:contact | |
| onSave={() => saveContact(contact)} | |
| onDelete={() => deleteContact(contact)} /> | |
| {/each} |
This component will take a contacts prop from a Rails template, which will be the current list of contacts from the database. We then loop over each contact with {#each contacts as contact}, and for each one, render a ContactRow. We also pass in callback functions to the Rows, which will make AJAX calls to save and delete contacts. Note that to make this example simpler, Api is just a little wrapper around fetch. When deleting a contact, we’ll also need to remove it from the list of contacts. So the onDelete function both does the DELETE call and filters out the contact from the list. We’re using bind:contact to get two-way binding when passing each contact to a row. That means when a user types a character, the contacts list in here will be reactively updated, and the changes are ready to be saved by saveContact. Webpacker-Svelte Integration Once those components are set up, we’ll need to actually render them on the page! If you’re using Rails, I’ve made it easy for you with a little library, webpacker-svelte, a light rewrite of the excellent webpacker-react.
webpacker-svelte has two pieces. First, a backend svelte_component(component_name, props = {}, options = {}) function for rendering an element that will be upgraded into a Svelte component on load. Second, a frontend WebpackerSvelte.setup({Component1, Component2}) function that registers the Svelte components that will do the upgrading. To set it up, you’ll want to add it to your gemfile:
| gem 'webpacker-svelte' |
and your package.json:
| npm i webpacker-svelte –save-dev | |
| # or | |
| yarn add webpacker-svelte –dev |
Like with webpacker-react, webpacker-svelte will re-mount components on every page load, even if you’re using Turbolinks. If you’re not using Rails, you can still use the NPM module. In a view helper on the backend, you’ll just want to add a function that renders an element with the data attributes that the client code will be looking for. A Ruby implementation looks like this:
| def svelte_component(component_name, props = {}, options = {}) | |
| tag = options.delete(:tag) || :div | |
| data = { data: { "svelte-component" => component_name, "svelte-props" => props.to_json } } | |
| content_tag(tag, nil, options.deep_merge(data)) | |
| end |
Next, we can register our components in the root application.js file:
| // app/javascript/packs/application.js | |
| import WebpackerSvelte from "webpacker-svelte" | |
| import ContactList from "../src/ContactList.svelte" | |
| WebpackerSvelte.setup({ ContactList }) |
And finally, replace the old HTML table with a svelte component, passing in the initial contacts from the database:
| <!– app/views/contacts/index.html.erb –> | |
| <table class="table"> | |
| <thead> | |
| <tr> | |
| <th>Name</th> | |
| <th>Email</th> | |
| <th>Twitter</th> | |
| <th>Phone</th> | |
| <th colspan="3"></th> | |
| </tr> | |
| </thead> | |
| <%= svelte_component("ContactList", {contacts: @contacts}, tag: "tbody") %> | |
| </table> |
With that, we’ve got Read, Update, and Delete working, with minimal changes to the markup.
Sharing State: NewContactButton
Next, users need to be able to create new contacts from the index page. Right now the New Contact button just links to the New Contact page. Instead, it should create a new contact, update the server, and add a new row to the table. We could add that button to the ContactList component. But it would be more convenient to render the NewContactButton totally separately, so we can put it wherever we want on the page. But that means figuring out cross-component communication, so clicking the NewContactButton will somehow change the list of contacts in the ContactList. For React that might mean spending a couple hours setting up Redux. Instead, Svelte has the concept of Stores, which are just simple implementations of the Observer pattern. You can set a store’s value, update it, and subscribe to updates. Svelte comes with writable and readable stores, and it’s easy to make custom stores that implement the store interface. Svelte also helps you build stores that are derived from other stores. First, let’s set up the store. It’ll be a writable store called contactStore, which starts as an empty list. We’ll also extract the save and delete functions from ContactList into this module, so all the ways to get and update contacts are collected together.
| // app/javascript/src/contact-store.js | |
| import { writable, derived } from "svelte/store" | |
| import Api from "./api" | |
| // Declare the writable store. | |
| export const contactStore = writable([]) | |
| export const saveContact = contact => | |
| Api.put(`/contacts/${contact.id}.json`, { contact }) | |
| export const deleteContact = contact => { | |
| // Filter the deleted contact from the store. | |
| contactStore.update(contacts => | |
| contacts.filter(({ id }) => id !== contact.id) | |
| ) | |
| return Api.delete(`/contacts/${contact.id}.json`) | |
| } |
This will now be the source of truth for contacts going forward, and any interested component can simply import the store to get and update the current list of contacts. Next, we’ll have to refactor ContactList a bit to initialize the store from props, and then render the contacts from the store. That means that when NewContactButton adds a contact to the store, the List will automatically get a reactive update and know to render the new item.
| <!– app/javascript/src/components/ContactList.svelte –> | |
| <script> | |
| import { onMount } from "svelte" | |
| import { contactStore, saveContact, deleteContact } from "../contact-store" | |
| import ContactRow from "./ContactRow.svelte" | |
| export let contacts | |
| // Initialize the store from props when the component mounts. | |
| onMount(() => { | |
| contactStore.set(contacts) | |
| }) | |
| </script> | |
| <!– Loop over the store instead of the contacts prop –> | |
| {#each $contactStore as contact} | |
| <ContactRow | |
| bind:contact | |
| onSave={() => saveContact(contact)} | |
| onDelete={() => deleteContact(contact)} /> | |
| {/each} |
Note that Svelte provides a little syntactic sugar for subscribing to and updating a store from a component. If you prefix the store name with a $ like with $contactStore, then you can treat it like a normal reactive value that you can render and assign to. This means there’s no need for anything like Redux’s mapStateToProps. With that refactor done, there are just a few changes to add the NewContactButton to the page, render the button, and update the store:
https://gist.github.com/will-wow/0e54b3bcbed02114f9e1104f3bb2de92#file-16-index-with-new-button-html https://gist.github.com/will-wow/0e54b3bcbed02114f9e1104f3bb2de92#file-17-new-contact-button-svelte-html https://gist.github.com/will-wow/0e54b3bcbed02114f9e1104f3bb2de92#file-18-contact-store-create-js https://gist.github.com/will-wow/0e54b3bcbed02114f9e1104f3bb2de92#file-19-application-with-new-contact-button-js
And that’s it for all the CRUD operations! Now we’ve got two Svelte components rendered separately on the page, communicating through a store.
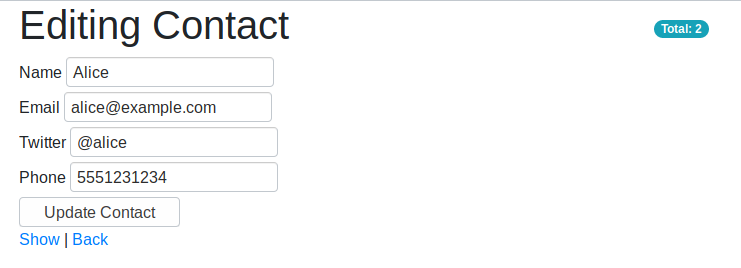
Sharing State: ContactCount
Finally, it’d be nice for users to always have a running total of their contacts. This should show up on both the index page (where it will change as a user adds and removes contacts) and the show and edit pages (where the count won’t change). That’s an interesting challenge because the counter on the index page should be fed by the store, but the counters on the static pages can just be fed by the database because they won’t change. There are a lot of possible solutions, but an easy one would be to just have the counter get its value from props if given, and otherwise fall back to the store. Implementing that is easy enough:
https://gist.github.com/will-wow/0e54b3bcbed02114f9e1104f3bb2de92#file-20-contact-count-svelte-html https://gist.github.com/will-wow/0e54b3bcbed02114f9e1104f3bb2de92#file-21-application-with-contact-count-js
So count defaults to null, unless a prop is passed in. The final $contactCount is either the count prop or the length of the $contactStore. And remember, prefixing contactStore with a $ sets up a subscription to the store, so the reactive declaration will be re-run every time the store is updated. With that, we can render this component on the different pages. First the dynamic index page: https://gist.github.com/will-wow/0e54b3bcbed02114f9e1104f3bb2de92#file-22-index-with-contact-count-html And then on the static pages:
| <!– app/views/contacts/edit.html.erb –> | |
| <%= svelte_component("ContactCount", count: @contact_count) %> |
This is pretty good, but I don’t love that $contactStore.length bit. If we wanted to change the shape of the store from an array to a key-value store or something, we’d have to remember to update this component too. Instead, we can define a new derived store: contactCountStore. It’ll always track the count, which lets this component have less knowledge about the structure of the store. That refactor looks like this:
https://gist.github.com/will-wow/0e54b3bcbed02114f9e1104f3bb2de92#file-24-contact-store-derived-js https://gist.github.com/will-wow/0e54b3bcbed02114f9e1104f3bb2de92#file-25-contact-count-derived-svelte-html
That’s better, and a good excuse to test out a derived store. Styling and Testing There are a couple important parts of a web framework that we haven’t covered. First, you may have noticed that we haven’t talked about styling yet. That’s on purpose! Svelte actually has some nice styling facilities that let you bundle isolated styles with your components. But when you’re using Svelte within a larger Rails app, you probably already have a CSS system in place and there’s no reason to change that. You can just use the same CSS classes as you do elsewhere in your app, and everything will be fine. But if you want to dig into Svelte’s style system, or see how to conditionally set CSS classes, the docs have some good examples. Second, we wouldn’t merge production code without tests, which we haven’t gotten to in this tutorial. The testing story with Svelte is pretty good, but there’s enough to talk about that it deserves its own post. So stay tuned for Part II, where we’ll dig into how to test these components!
Wrapping up
And with that, we’re done! With just a little Svelte, we’ve added a ton of dynamism to our Rails app, without a significant re-write. And again in production mode, the whole JavaScript build comes out to only 14.58 KB gzipped, so you’re not weighing down your app with a bunch of frontend code. To see this all working together, you can check out the master branch here. Svelte also has a great interactive tutorial to let you get more comfortable with the framework and dig into advanced techniques like animations and slots. There’s also Sapper, a batteries-included application framework like React’s Next.js. If you’re looking to add some dynamic content to a server-rendered app, give Svelte a try!

Will Ockelmann-Wagner
Will Ockelmann-Wagner is a software developer at Carbon Five. He’s into functional programming and testable code.