Using RVM on TeamCity build agents
We have been using TeamCity to manage the continuous integration, testing, and deployment of many of our recent projects. We have also been using RVM on all of our recent Rails projects to allow us to install multiple ruby versions and create isolated gemsets for each project. RVM proved to be particularly useful on our TeamCity build agents where it allows a single agent to build many projects without the fear that we will see gem or ruby version conflicts between projects or introduce dependencies on gems installed on the build server but not enumerated in the project. Here’s the configuration I have used to get our build agents to use each project’s RVM settings.
As much as I would like to see each project able to configure all of it’s dependencies on its environment we still have some dependencies which are not captured in the project configuration. For example we have projects which need access to a database servers or need private keys to use when deploying. As a result I have favored running as many build agents as possible as local build agents so that they share this configuration. The configuration below is therefore usually only applied once but in an environment using remote build agents it would need to be repeated or shared between every compatible remote agent’s system. Perhaps one day we’ll see each project include chef recipes to configure it’s own build environment and I would be interested to hear from anyone who has automated their CI configuration to that extent.
1. Create a key for github access
> ssh-keygen -t rsa -C "#{project_name}"
Upload the public key to github as a deploy key for the project so that the build agent can pull from the github repository.
2. Setup rvm and a gemset for the project
> rvm install ruby-#{version}-r#{patch level}

> rvm use ruby-#{version}-r#{patch level}

> rvm gemset create #{project name}

> rvm gemset use #{project name}

> gem install bundler
This could probably all be automated as part of the project’s .rvmrc file.
3. Setup a ssh config for the project
The keys used by many of the services we interact with are unique and tied to an account so we need to have TeamCity use different ssh keys when connecting to projects under different accounts. Add a new entry to ~/.ssh/config to alias a host to use a specific ssh key
# GitHub for #{new_project}

Host github-#{new_project}

    HostName github.com

    User git

    ForwardAgent yes

    IdentityFile /home/teamcity/.ssh/teamcity_#{new_project}_rsa
Connections to `github-#{new_project}` will now default to use `teamcity_#{new_project}_rsa` rather than the default `id_rsa`. By specifying the key in the ssh config file we’re able to use client side checkouts which will be useful when deploying using git. For projects able to use server side checkouts we can specify a private key to use in TeamCity’s VCS settings.
4. Create a new TeamCity project
On projects with multiple build steps using the same build runner we could create a template to avoid repeating these settings in each build phase. Unfortunately TeamCity 5.1 templates do not support running multiple types of build runners so projects with both command line (`bundle install`) and rake runners (`rake spec`) require some repetition.
| Setting the VCS root: | |
|---|---|
| Type of VCS | Git(JetBrains) |
| Fetch URL | git@github-#{project name}:#{account name}/#{project name}.git |
| Authentication method | default private key |
| Version Control Settings: | |
|---|---|
| VCS Checkout Mode | Automatically on client |
Client checkouts have a full git repository while a server side checkout performs a git pull and then copies the resulting files but not the full git work-tree to the build agents leaving the agents unable to easily run git commands. A client side checkout is therefore preferable when using `git push` to deploy a project.
| Command line tasks (bundle install): | |
|---|---|
| Runner | command line |
| Executable | /home/teamcity/.rvm/gems/%rvm.ruby%@%rvm.gemset%/bin/bundle |
| Arguments | install |
| Rake tasks (test): | |
|---|---|
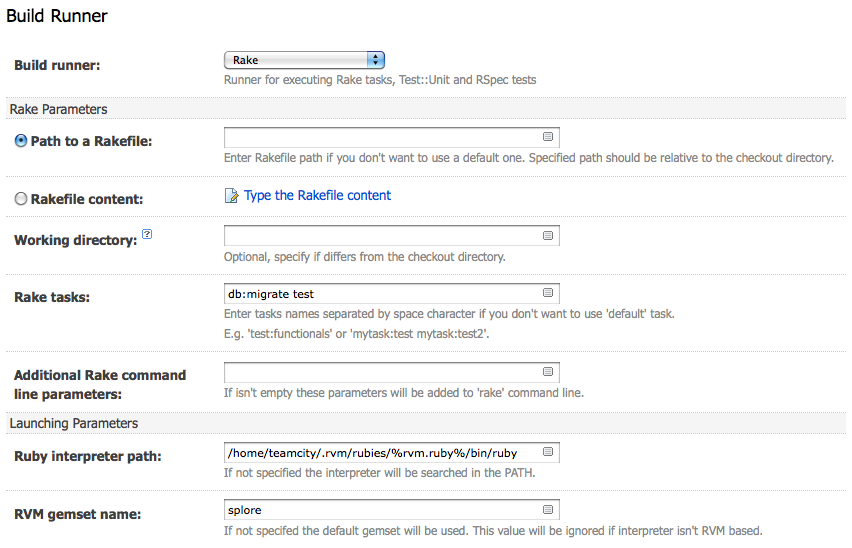
| Runner | rake |
| Rake task | %rake.tasks% |
| Additional rake command line parameters | %rake.opts% |
| Ruby interpreter path | /home/teamcity/.rvm/rubies/%rvm.ruby%/bin/ruby |
| RVM Gemset Name | #{project name} |
| Configuration parameters | |
|---|---|
| rvm.ruby | ruby-#{version}-r#{patch level} |
| rvm.gemset | #{new_project} |
If using a template set the `rake.tasks`, `rake.opts`, and any other configuration parameters the template uses. Each build configuration based on the template can specify its own configuration parameters but cannot override the rake task and command line parameters directly.
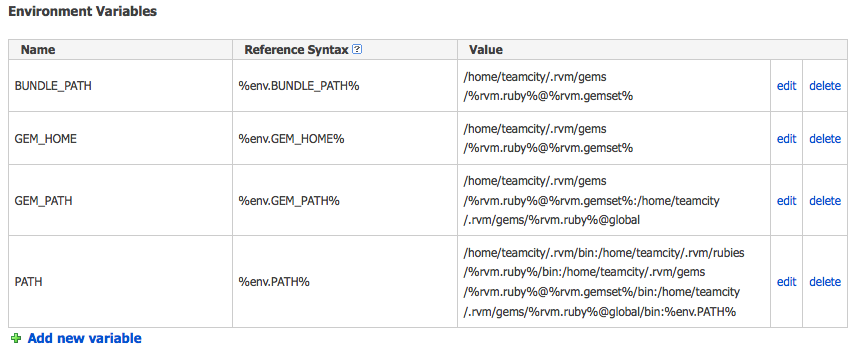
To use the project’s RVM ruby and gemset add the following environment variables with appropriate paths:
| BUNDLE_PATH /home/teamcity/.rvm/gems/%rvm.ruby%@%rvm.gemset% |
| GEM_HOME /home/teamcity/.rvm/gems/%rvm.ruby%@%rvm.gemset% |
| GEM_PATH /home/teamcity/.rvm/gems/%rvm.ruby%@%rvm.gemset%:/home/teamcity/.rvm/gems/%rvm.ruby%@global |
| PATH /home/teamcity/.rvm/bin:/home/teamcity/.rvm/rubies/%rvm.ruby%/bin:/home/teamcity/.rvm/gems/%rvm.ruby%@%rvm.gemset%/bin:/home/teamcity/.rvm/gems/%rvm.ruby%@global/bin:%env.PATH% |
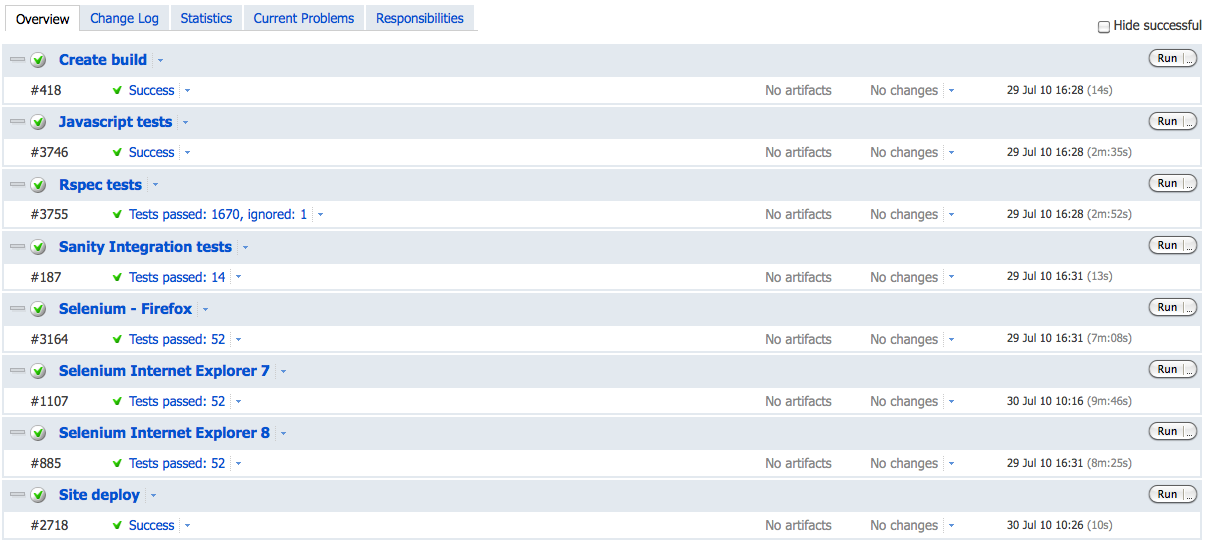
Now I can finally build a set of build configurations for a project which will all use the project’s RVM settings to isolate it from other projects on the TeamCity server.
JetBrains appears committed to adding RVM support to TeamCity and added the `RVM Gemset` property to rake tasks in TeamCity 5.1.3 so hopefully we’ll see additional RVM support in future releases.


